These are pictures to help with assembling when you use the KW-118C walkman with the ?* kit.
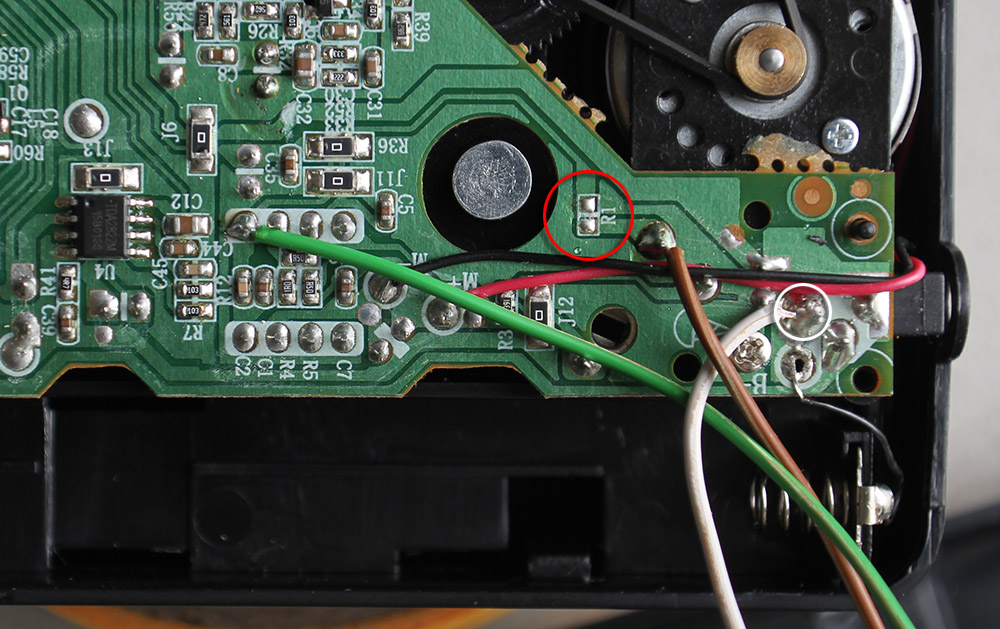
Remove R1 (Red circle, hold your soldering iron with solder on the tip on the resistor till its solder melts and move slowly away from the PCB, it should stick to the soldring irons tip), White wire is GND and connects to the wite circle point. The rest is easy to see on the picture.
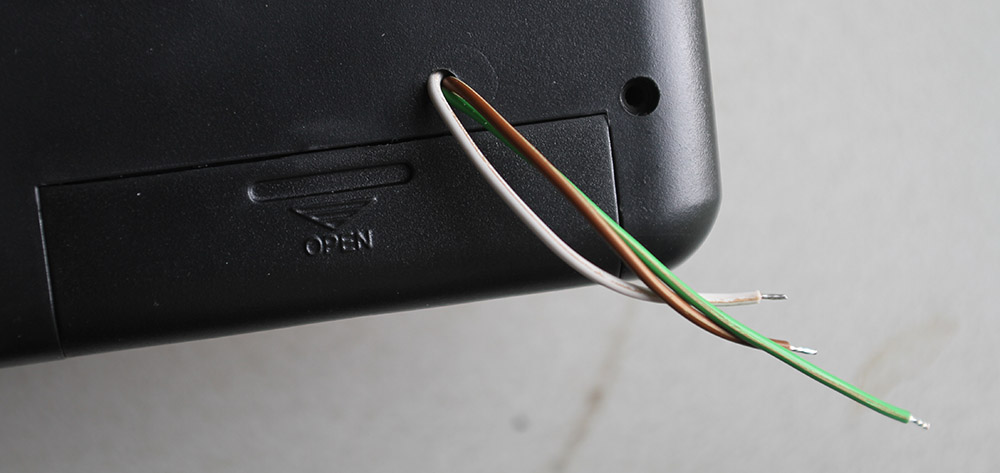
Drill the hole with a 3mm drill, and feed the wires thru.
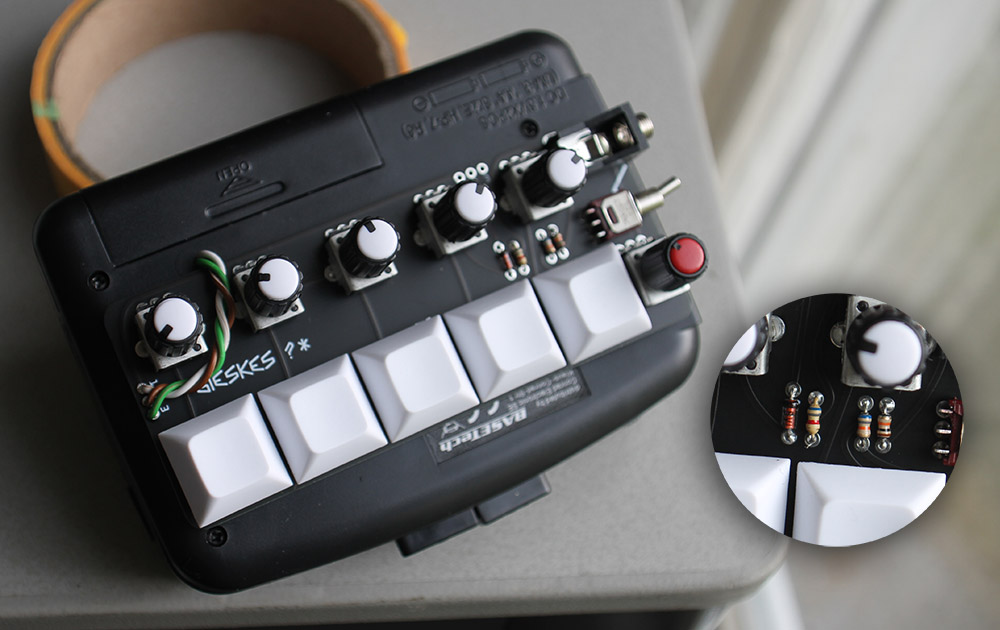
Solder the components to the PCB, cut all legs short so it sticks good to the walkman with the double sided tape. Check the zoomed it picture for where what parts go's, the 100k resistor is replaced with a 68k resistor.
Solder the wires to the walkman in these places, and with these colors.